


So, you have met the clamp meter, the superstar of all multimeters that everyone’s talking about? And are now looking for a guide that will help you use it properly to measure AC and DC amps? You want to own it, but it makes sense to first see how the thing works, right?
Well, you have come to the right place. This is the ultimate guide on, structured keeping first-time users and beginners in mind.

Learning how to operate a clamp meter is easy and straightforward. You are already halfway there if you know how to operate a general-purpose multimeter. But, it is important to know the slight differences between them, which will help you make informed decisions while testing and troubleshooting.
A professional technician knows both how a clamp meter works and how best to use it in a work environment.
What is a Clamp Meter?
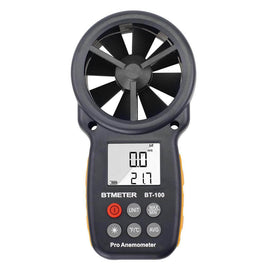
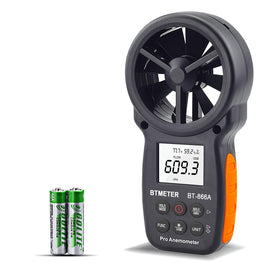
A clamp meter is an advanced variation of a regular multimeter with the major difference of a jaw-like structure on the top that allows contactless measurement of current and voltage.
You can ‘clamp’ this structure around conductors (a wire, for instance) to detect the current running through it.
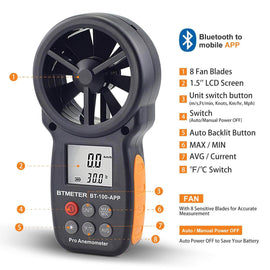
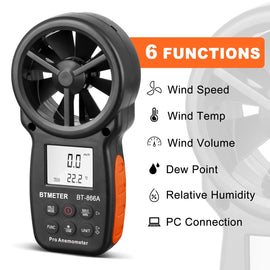
With this being the basic principle, modern clamp meters come with functions that enable measurement of several quantities, features that make troubleshooting and analysis easier, and ultimately, more safety measures.
Since you don’t have to manually plug testing probes/leads to live circuits and also don’t have to disconnect the system to take a measurement, clamp meters have quickly become one of the most important tools in an electrician’s life.
Chief Differences Between a Clamp Meter and a DMM
Following are what makes a clamp meter different from a digital multimeter:
- Primarily used for DC and AC amps measurement
- Contactless quantity measurement
- Lower resolution (only till hundredth of a unit)
A clamp meter and a digital multimeter (DMM) usually go hand-in-hand as you cannot use them interchangeably for some testing applications.
How Do Clamp Meters Measure Current?
As mentioned above, clamp meters work on the principle of transformer action.
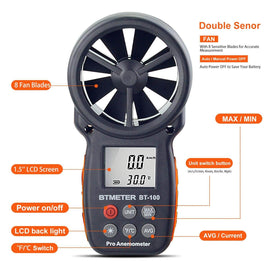
The jaw-like structure or the clamp of a clamp meter is made up of a ferrite core with copper windings around it. This core and its windings act as a secondary winding (as in a transformer). So, when this jaw-like structure is “clamped” around a current-carrying conductor, it detects the current and couples it.
This coupled current is then transferred from the ferrite core to the shunt of the tester’s input. Since this coupled current is a very small amount (usually 1/1000th), the tester adjusts this value by multiplying and providing the accurate current magnitude.
It is because of this principle that clamp meters can measure high magnitudes (in thousands) of current.
In other words, if you are measuring a conductor that is carrying a current of 1 ampere, the tester will detect it as 1 milliamp and then convert it into the original value. This value is displayed to you on the screen.
How to Use a Clamp Meter?
Since analog models are not widely in use today and it is recommended that you buy a digital model, we will only focus on the working of a digital clamp meter.
Additionally, in the following guide, the steps are only for measuring DC amps or AC amps. For all other quantities, the process is similar but you will have to select the respective function in the dial.
Steps to Follow While Using a Clamp Meter to Measure Current
Step 1
Switch ON the meter and remove the probes (if attached)
Step 2
Select the AC current or DC current function using the dial.
The display should show a jaw sign, which will confirm that the measurement is being detected through the clamp (Read the user manual to see how your meter indicates this)
Step 3
Open the jaw-like structure using the side lever and insert the conductor through which the current is to be measured
Technicians can do this with their secondary hand so that measurements can be noted down using the primary one
Step 4
Then close the jaw-like structure and level the conductor between the alignment marks inscribed on the jaws.
If these marks are not shown in your model, try to adjust the conductor in the center of the clamp
Step 5
The display will show the appropriate reading. Users can change the resolution as per requirements, but most meter models do this automatically.
It is recommended that all measurements should be taken for conductors that are insulated properly. DO NOT measure around live wires.
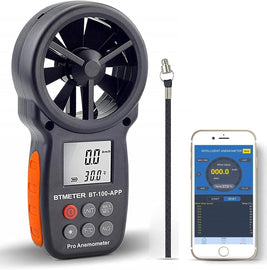
A Side Note for Clamp Meters with Flexible Current Probe
Few Useful Tips While Measuring with a Clamp Meter
Experience always comes first in testing, but if you are a beginner, here are some useful tips to help you through your first projects:
When measuring current, never clamp around two conductors at the same time as the current passing through them will cancel each other (if they are flowing in opposite directions). Always use a clamp meter on a single conductor
Always wear industry-grade safety gloves while operating a clamp meter
Disconnect the test probes/leads before using a clamp meter to measure current using the jaws
Always keep your fingers behind the tactile barrier
In most models, the meter will indicate if the current being measured is below 0.5 A
It is recommended to use the “zero” function while measuring DC current, which removes DC offset from the measurement, giving accurate results
When readings seem inaccurate, always check the function selected first before checking anything else
Using a clamp meter is easy if you understand how it works. It becomes easier if follow this guide while experimenting with it.
So, take out your new tool and measure away.
